Well, hello there! It’s been a wee while, but fear not. The baking medic as still been hard at work! So while today I will be only posting about one recipe, I’ll give you a sneak peak at a few of the things I’ve made in the fast few months.
The recipe today is “Canada’s Best” Carrot Cake. Now, that seems like a pretty extravagant claim to make, seeing as Canada is freaking HUGE (geographically speaking…did you know almost 41 UKs would fit that vast country of mine?). However the recipe came from one my much loved magazines, Canadian Living. This magazine has a lot of memories for me; my mum was always subscribed to it and I remember flicking through the pages at the back, marveling at the beautiful pictures of… food. Even as a kid I had a bit of a one track mind.
But back to “Canada’s Best” Carrot Cake. This cake is incredibly moist, so moist, deliciously moist. There is of course a secret ingredient – pineapple. Yup, pineapple chunks in carrot cake. However, the generous amount of grated carrots and oil help too. :)
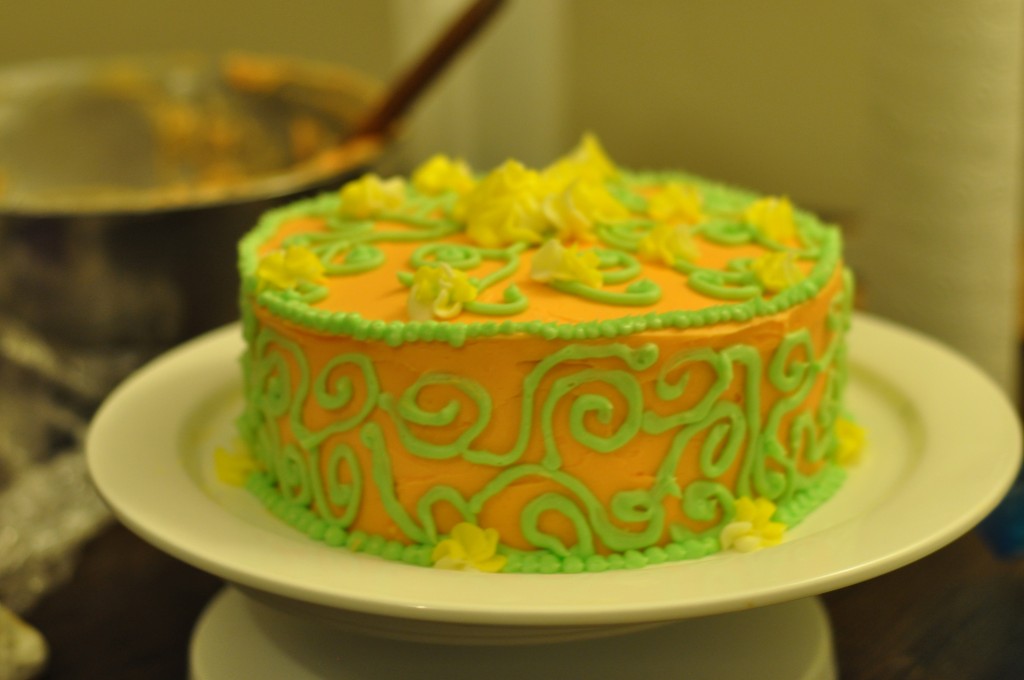
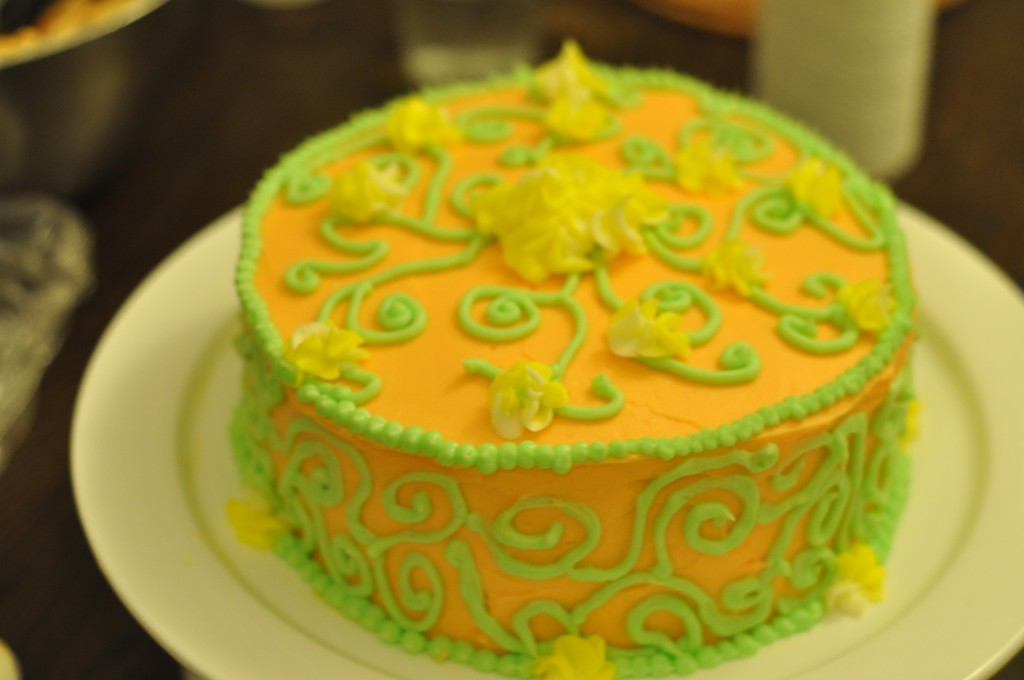
I made this cake for Hallowe’en last week. I had a few friends over and we manged Boeuf Bourguignon, garlic mashed potatoes, broccoli and copious amounts of cake. In spirit of the season, I wanted to make the cake look pumpkin-esque. So, I topped the cake with a cream cheese icing, coloured orange. Then I piped green “vines” all around the cakes top and sides. Finally I added a few yellow drop flowers, but no body seems to know that pumpking flowers are yellow, so I think it was a wee bit confusing.
Here are a few other photos of things I’ve made recently:
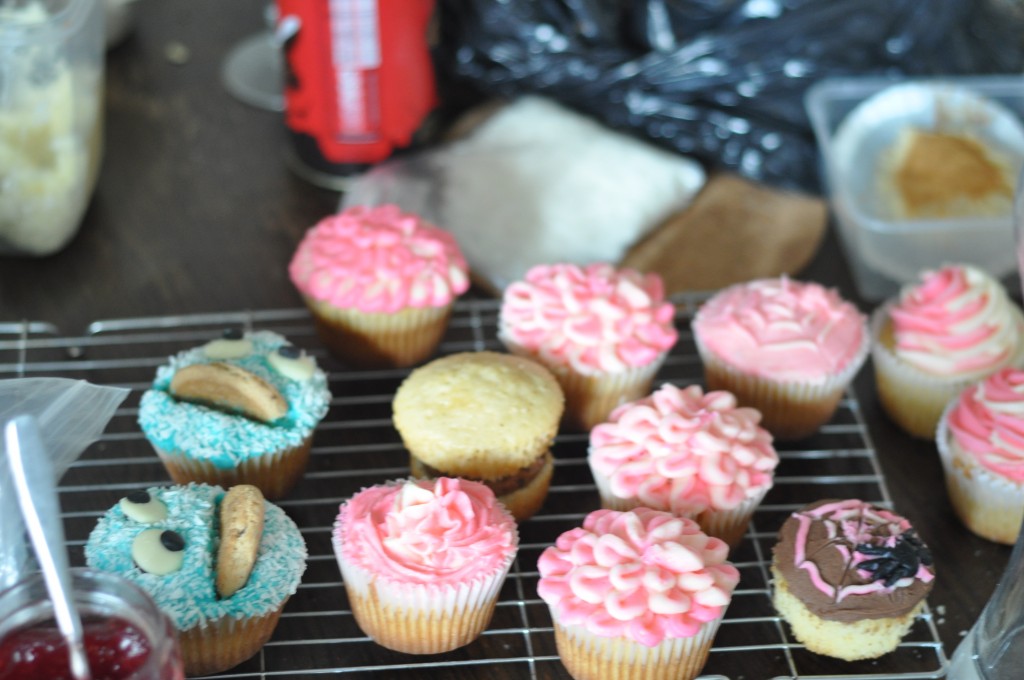
A few of the other cupcakes we made at the class. Recognise the Cookie Monster and Hamburger cupcakes? :)
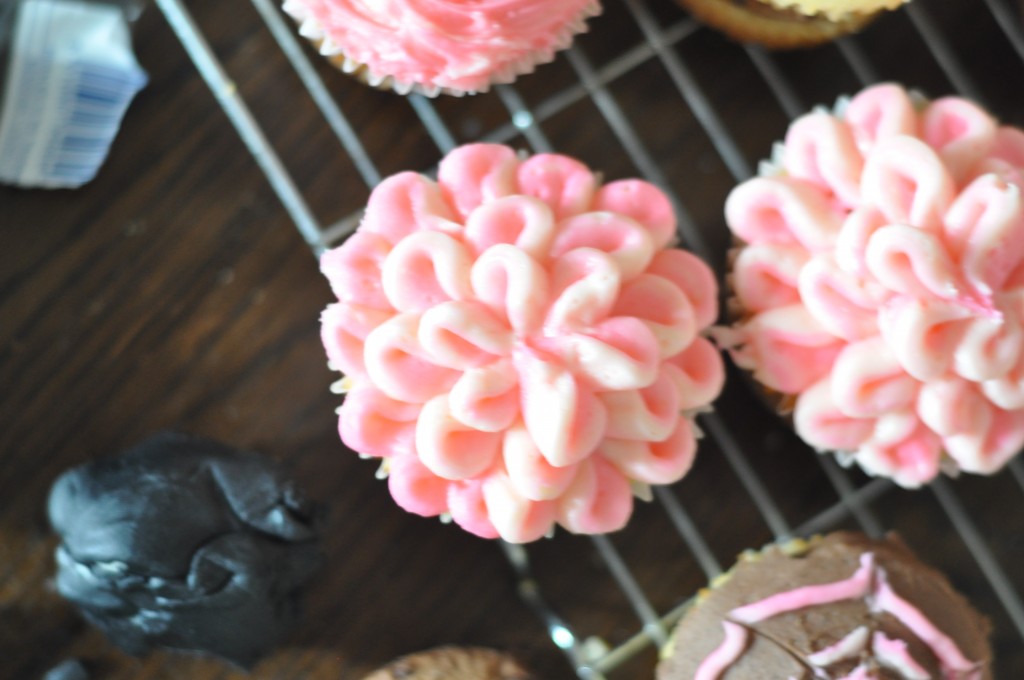
Beautiful Flower Petal Cupcakes with Two-tone icing - made for the cupcake decorating class I taught.
Canada’s Best Carrot Cake
adapted from Canadian Living
Ingredients:
- 2 cups (500 mL) all-purpose flour
- 2 tsp (10 mL) baking powder
- 2 tsp (10 mL) cinnamon
- 1 tsp (5 mL) baking soda
- 3/4 tsp (4 mL) salt
- 1/2 tsp (2 mL) nutmeg
- 3/4 cup (175 mL) granulated sugar
- 3/4 cup (175 mL) packed brown sugar
- 3Â eggs
- 3/4 cup (175 mL) vegetable oil
- 1 tsp (5 mL) vanilla
- 2 cups (500 mL) grated carrots
- 1 cup (250 mL) drained crushed canned pineapple
- 1/2 cup (125 mL) chopped pecans (optional – I substituted walnuts for the pecans)
Directions:
- Grease and flour 2 9″ round pans. Line the bottom of each of them with baking paper; set aside. Preheat the oven to 350°F/180°C/gas mark 4.
- In a large bowl, sift together the flour, baking powder, cinnamon, baking soda, salt and nutmeg. In a separate bowl, whisk together the two sugars, eggs, oil and vanilla using a wire whisk until smooth.
- Make a well in the centre of the flower mixture. Pour in the sugar/egg mixture and gently fold in until just moistened. Just as with muffins, this process should take between 15-20 “strokes” with the spatula. Stir in the carrots, pineapples and nuts. Divide equally between the two prepared baking pans.
- Bake in the centre of the oven for 40 minutes or until a toothpick inserted in the centre of the cake comes out clean. Set the timer for 5 minutes before the time and keep a close eye on the cake! The the cakes cool in the pan for 10-15 minutes before turning them out on a wire rack to cool completely.
Cream Cheese Icing:
Makes a enough to generously fill, ice and decorated a 9″ two layer cake
Ingredients:
- 190 g butter, room temp
- 300 g full fat cream cheese, chilled
- 1 tbsp vanilla
- 2 tsp milk (there abouts)
- 1 kg icing sugar
- orange, yellow and green gel food colouring (optional)
Directions:
- Cream together on high speed the vanilla, butter and cream cheese until well mixed.
- Gradually add in the icing sugar in small amounts. Add the milk. I only added a very small amount of milk because I wanted to be able to pipe with the icing. However, the icing should be so stiff that you can’t spread it, but you don’t want it too thin that it’ll slide off your cake! It’s a bit of a guessing game that comes with experience. :)
- Beat for another minute or so on high speed until the icing is fluffy
- Add food colouring if desired. I added orange food colouring to quite a large amount, and reserved to small bowls of icing to colour green and yellow.
Assembly:
- Make sure your cakes are level. If they are domed, you can level them with a sharp serrated knife or a cake leveler.
- Smear a small amount of icing on the serving plate. This will “glue” your cake to the plate. Place on of the layers on the plate, cut side up.
- Spread about 1/2 cup of icing (just a guess…. add as much icing as you like!) of icing onto the top of your first layer, leaving about a 1/2 inch space around the edge.
- Top with the second layer, placing the cut side down.
- Crumb coat: Seal in all those pesky crumbs by applying a crumbcoat. Spread a small amount of icing over the cake to completely cover it in a thin layer. It doesn’t matter if crumbs get in the icing – that’s the point. Refridgerate the cake for 10 minutes before continuing. At this point I coloured the two small pots of icing and got their piping bags prepared… in case you were at a loss of what to do! ;)
- Icing the Cake: Ice the rest of the cake with the orange cream cheese icing. Start from the top and work your way down to the sides. There should be a plenty of icing, so slather it on thick!
- For the vines: Place the green icing in a piping bag with a small round tip (like one for writing letters). Beginning from the centre of the cake, pipe swirls in an outward direction. Do what ever your like really – it’s your cake! :)
- Pipe vines all around the side of the cake, adding swirls and curves etc.
- Create a border around the cake by piping small dots around the upper and lower edges.
- For the flowers: Using a 2D tip, fill a piping bag with the yellow icing. Pipe small drop flours around your cake, at junctions between two vines/in the centre of the cake etc.
- Et voila! EAT.
Comments are closed.