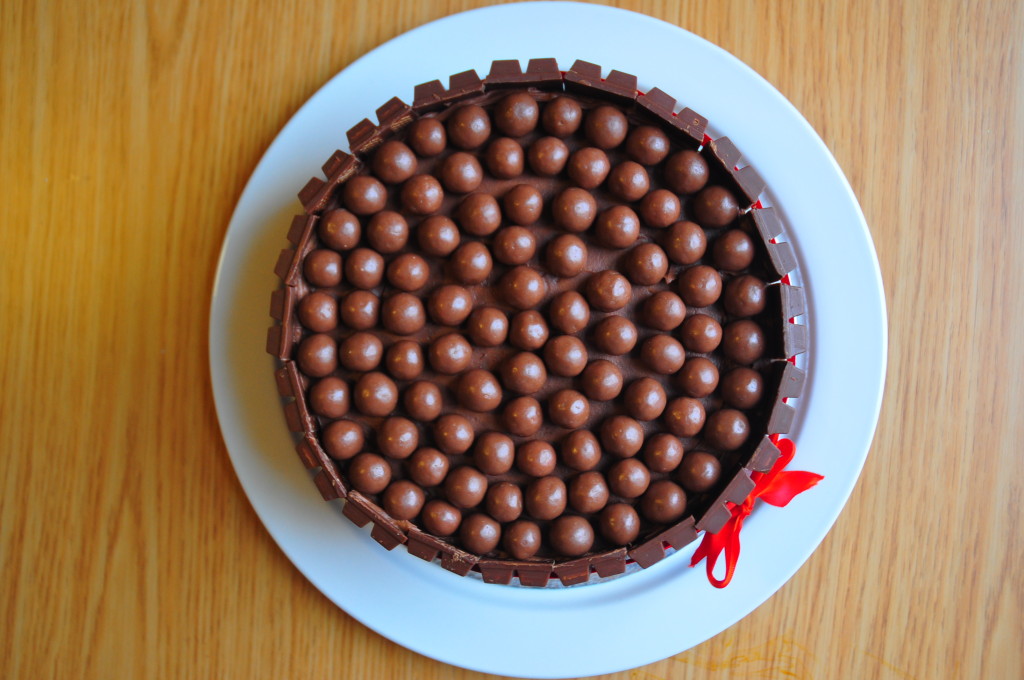
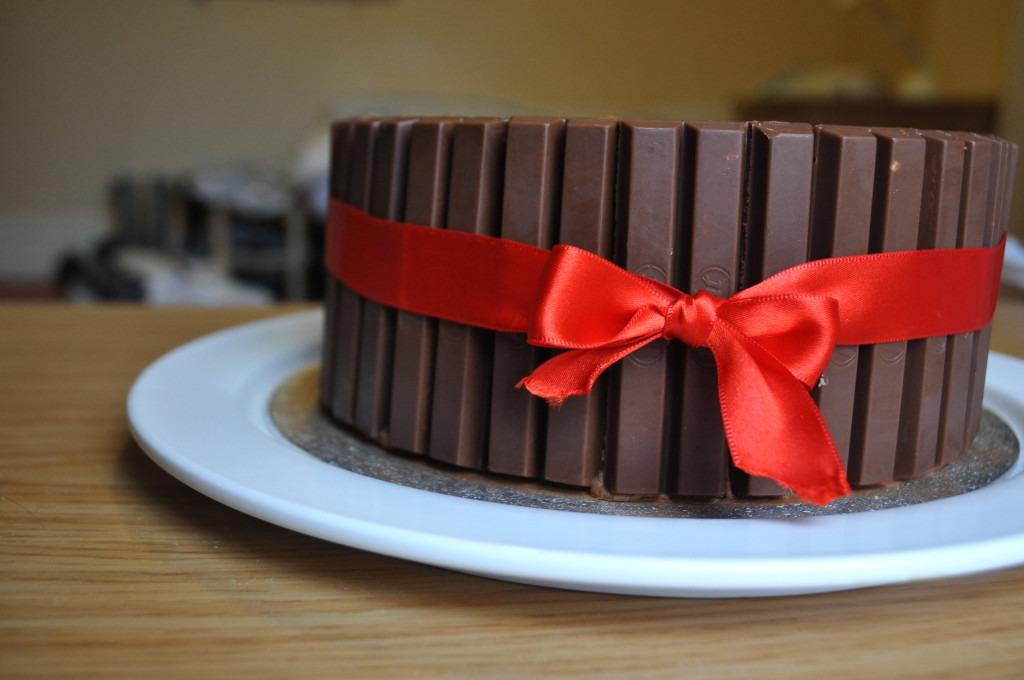
This is the most intensely chocolate cake I have ever made. Cake of Death. Chocolate buttercream. 12 KitKat bars. Over 200g of Maltesers. This cake is chocolate suicide on a plate. I stumbled across a photo of this cake whilst browsing cake recipes on the interweb and I knew instantly that I had to make it. Not only did it have freaking KitKats all around it, but I loved how it looked almost geometric. The clean straight lines made by the fingers of each KitKat bar and the mosaic pattern made by the Maltesers on top just really appealed to my inner cake decorator.  I set out to think of an appropriate occasion to make this cake. Unfortunately, I don’t know if there will ever be an “appropriate” time to eat a cake that uses 12 chocolate bars and a huge bag of Maltesers. So I decided to make it for no special occasion, but just because I could. I informed a group of friends that I would be coming along one evening with this cake and that we were going to eat it or die trying.
The cake itself is my tried and trusted Cake of Death. I don’t think I’ll ever find a chocolate cake recipe that is more moist, delicious, and easy to throw together than this one. It was the obvious choice for this cake and it never fails to please. The chocolate buttercream is adapted from Juniper Cakery. I fell in love with their stunning and creative cakes as soon as I found their website. However, they have a number of helpful tutorials and recipes on their blog as well. This is a half recipe of the one posted and it made more than enough to generously ice this cake.
Overall, this cake was so much fun to make! However, it is extremely rich and chocolate and surprisingly tricky to cut up! Also, 12 KitKat bars and a huge bag of Maltesers aren’t the cheapest of baking ingredients, especially on a student budget. This is a cake to make for a special occasion when you truly want to go over the top.
Happy Baking!
Cake of Death
makes one 8″ two layer cake
Ingredients:
- 1 3/4 cups all-purpose flour
- 2 cups white sugar
- 3/4 cup unsweetened cocoa powder
- 2 teaspoons baking soda
- 1 teaspoon baking powder
- 1 teaspoon salt
- 2 eggs
- 1 cup strong brewed coffee, room temperature
- 1 cup buttermilk (add a few tsp of white vinegar or lemon juice to the milk)
- 1/2 cup vegetable oil
- 1 teaspoon vanilla extract
Instructions:
- Preheat oven to 350 degrees F (175 degrees C). Grease, coat with cocoa powder, and line with baking parhcment two 8 inch round cake pans.
- In large bowl combine flour, sugar, cocoa, baking soda, baking powder and salt. Make a well in the center.
- Add eggs, coffee, buttermilk, oil and vanilla. Beat for 2 minutes on medium speed. Batter will be thin. Pour into prepared pans.
- Bake at 350 degrees F (175 degrees C) for 40-45 minutes, or until toothpick inserted into center of cake comes out clean. Cool for 10 minutes, then remove from pans and finish cooling on a wire rack. See below for decorating instructions.
Chocolate Buttercream
Makes enough to generously icing a two layer 8″ cake
Ingredients:
- 375g unsalted butter, softened
- 200g icing sugar
- 1 tsp vanilla
- 200g plain chocolate, chopped
- 4 tbsp cocoa
Instructions:
- Cream together the softened butter aand the vanilla with an electric mixer until smooth and fluffy. Gradually add in the icing sugar, mixing on low speed.Â
- Melt the chocolate in the microwave at 20 second intervals, stirring frequently. You can also melt the chocolate in a heatproof bowl suspended over simmering water. Set aside to cool slightly.
- Pour the colled chocolate into the butter mixture and beat on medium until well in corporated.
- Sift in the cocoa powder and beat until thoroughly mixed. Finally, beat the icing on high for 30 seconds. You should have some dreamily smooth chocolate buttercream that is soft but should still hold its shape.
Decorating Instructions:
You will need:
- 12-13 KitKat Bars
- 230g Maltesers bag (enough to cover the top with some extras to snack on)
- 1 Cake of Death
- 1 recipe of chocolate buttercream
Helpful but not essential:
- cake board
- cake turn table
- offset spatula
- 1m of ribbon
Instructions:
- Smear a small bit of icing on the bottom of your cake board/plate. This will help stick the cake to its board. Place the bottom layer domeside up on the centre of the plate.
- Spoon a large dollop of icing onto the cake (~3/4 c). Using the offset spatula, spread the icing evenly outwards up to the very edge of the cake. Place the second layer domeside down over the bottom layer.
- Optional: crumb coat the cake. I didn’t do that in this cake because I was covering up the surface with the chocolate bars and Maltesers anyways.
- Place a huge dollop of icing on the centre of the top layer. Spread it out towards the edge using an offset spatula. Add another spoonful of icing and push this over the edge of the cake. Smooth out the icing around the side of the cake, never letting the offset spatula touch the surface of the cake (this is how you get crumbs mixed in the icing – especially important not to do as I didn’t crumb coat the cake). Repeat so that the whole cake is covered in icing.
- Run the offset spatula along the side of the cake to smooth out the icing. Smooth out the icing on the top of the cake as well.
- Break the KitKats into two-fingers each and gently press into the side of the cake. Continue doing this until the whole cake is covered. I needed one extra finger to fill the final gap so I ended up using 12 full bars plus 1 finger.
- If necessary, add a bit more icing to the top of the cake so that the top of the Maltesers will be level with the top of the KitKat bars.
- Arrange the Maltesers in concentric circles around the top of the cake. I had a few extras with the 230g bag I used – perfect for snacking!
- If desired, tie a ribbon around the cake and give it a pretty bow. Done! Icing this cake was pretty easy and took less than 20 minutes.


